Manage Maintenance Contracts
Note: This topic refers to maintenance contracts and not project contracts.
Contracts are used to group and define work streams or operational areas that reflect the organisational structure (for example: cleaning, hard FM, portering or linen).
In addition, contracts are used to measure and control external or third-party personnel and companies that provide a specialist service to the organisation.
Contracts may be used to control monitor cost of supplying services to third parties that operate within the organisation (for example: tenanted shops or other tenanted building spaces).
By setting up a maintenance contract, you can define what it covers against the service request. It could be that 'Contractor A' covers jobs between 9am – 4pm, and 'Contractor B' covers jobs outside of that time. It could also be that 'Contractor A' covers certain locations or tasks.
Use K2 to:
To add or edit a maintenance contract:
-
Navigate to Maintenance > Contract Management > New Maintenance Contract.
Alternatively, search for and open an existing maintenance contract.
The Maintenance Contract Editor is displayed.
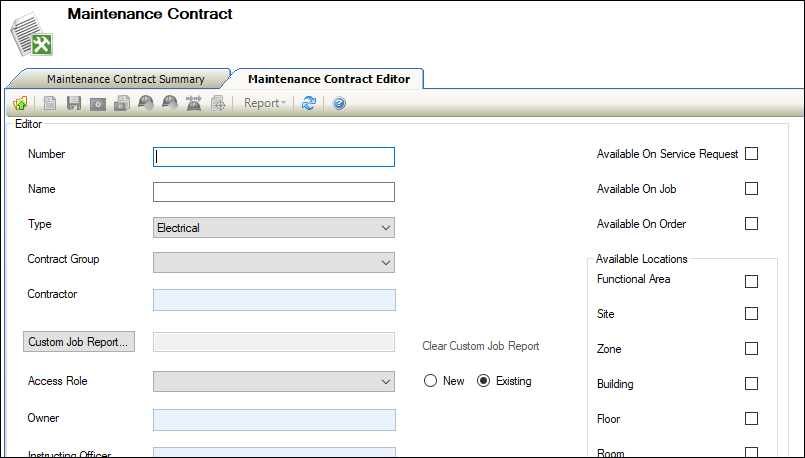
- Enter or edit the relevant details.
The fields on the Maintenance Contract Editor are described in the following table.
| Section | This field | Holds this information... |
|---|---|---|
| Editor | Number | A unique reference number for the contract. |
| Name | The name of the contract. | |
| Type |
The type of contract. Note: These can be defined in Maintenance Contract Type reference data (accessed by navigating to Maintenance > Contract Management > Contract Management). |
|
| Contract Group |
The contract group. Note: These can be defined in Contract Group reference data (accessed by navigating to Maintenance > Contract Management > Contract Management). |
|
| Contractor |
The contractor undertaking the work. Select from the drop-down list. Alternatively, click the New button adjacent to the field to add a new agency.
Refer to Add or Edit an Agency for further information on recording agencies. |
|
| Custom Job Report | The report that is used to issue jobs to the contractor, if applicable. The report must be available on the report server to be available to select. | |
| Access Role |
The role for the group of people that will be able to edit the contract SLA. Do one of the following:
|
|
| Owner | The contract owner. Select from the list of contacts. | |
| Instructing Officer |
The person responsible for the contract. Select from the drop-down list, which contains contacts with the Is Instructing Officer check box selected. Refer to Add or Edit a Contact for further information. |
|
| Start Date | The date the contract is due to start. | |
| End Date | The date the contract is due to end. | |
| Review Date | A review date for the contract, if required. | |
| Task Prefix | The prefix to append to the job number of any jobs that have been created from a PPM Task and are linked to the maintenance contract. | |
| Contract Value | The value of the contract. | |
| Service Types | The service types. Select 'Maintenance' from the drop-down list. | |
| Comments | Any comments regarding the contract. | |
| Available On Service Request | Whether the contract can be selected on service requests. This is populated automatically depending on the Services Types field, but can be overridden. | |
| Available On Job | Whether the contract can be selected on jobs. This is not applicable to PPM contracts. | |
| Available On Order | Whether the contract can be selected on orders. | |
| Available Locations | Functional Area | Whether the contract is available against functional areas, sites, zones, floors or rooms. This is not applicable to PPM contracts, but it is mandatory, so select at least one field. |
| Site | ||
| Zone | ||
| Floor | ||
| Room |
- Click Save.
The contract scope allows you to configure specifically what is managed as part of the contract. The contract scope must be defined before use.
To add or edit a contract scope:
- Search for and open the relevant contract record.
-
Do one of the following:
-
Click the Define Contract Scope button in the Required Actions section

Note: This is only displayed if the contract does not have a contract scope.
-
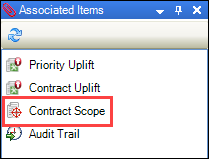
Click the Contract Scope option in the Associated Items panel
The Contract Scope screen is displayed.
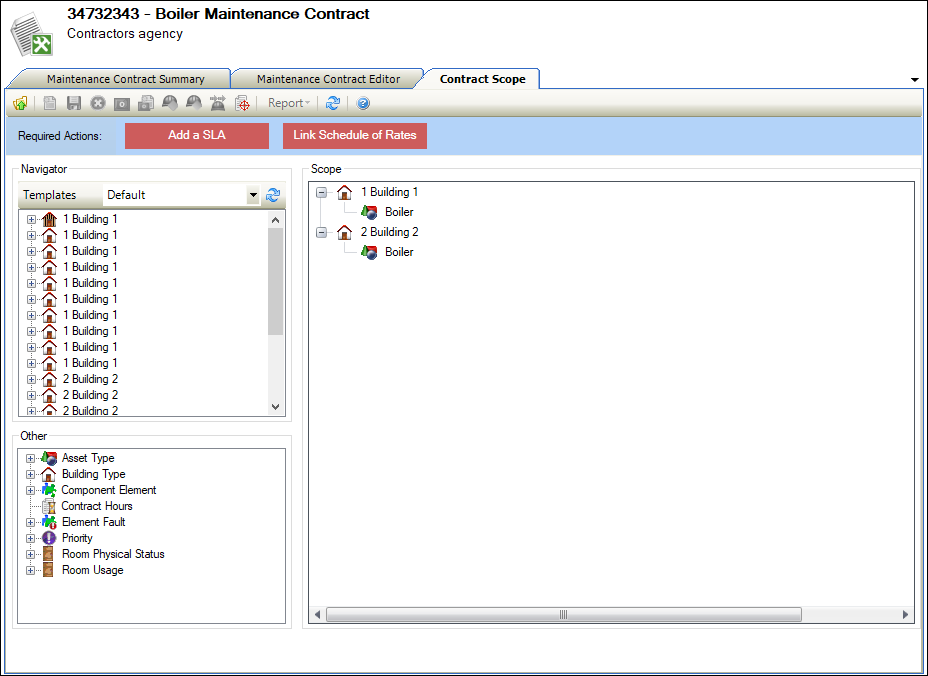
The screen is divided into the following panels:
- Navigator - displays business units, sites, buildings, floors, rooms and so on
- Other - displays the following nodes:
- Asset Type - these can be defined in Types reference data (accessed by navigating to Functions > Asset > Asset).
- Building Type - these can be defined in Building Type reference data (accessed by navigating to Functions > Core > Reference Data > Buildings).
- Component Element - these can be defined in Element List reference data (accessed by navigating to Functions > Component > Component).
- Contract Hours - allows you to enter contract hours for a node entered from the Other section
- Element Fault - these can be defined in Element List reference data (accessed by navigating to Functions > Component > Component).
- Priority - these can be defined in Priorities reference data (accessed by navigating to Services > Service Request).
- Room Physical Status - these can be defined in Physical Status reference data (accessed by navigating to Functions > Core > Reference Data > Core).
- Room Usage - these can be defined in Usage reference data (accessed by navigating to Functions > Core > Reference Data > Rooms).
- Scope - displays the structure of the maintenance contract scope
-
- Drag and drop a node from the Navigator or Other section into the Scope section. Dragging and dropping a node onto another node creates a child node.
- Click Save.
The SLA defines the Service Level Agreement for the contract.
To add or edit an SLA:
- Search for and open the relevant contract record.
-
Do one of the following:
-
Click the New SLA option in the Tasks panel
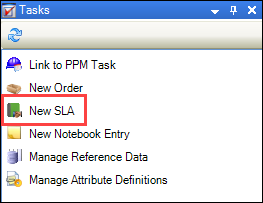
Note: This is only displayed if the contract does not have an SLA assigned.
-
Click the Add a SLA button in the Required Actions section

Note: This is only displayed if the contract does not have an SLA assigned.
-
Click the SLA(s) option in the Associated Items panel and then double-click an existing SLA to open it
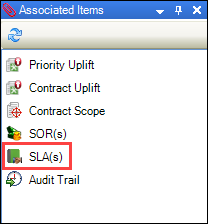
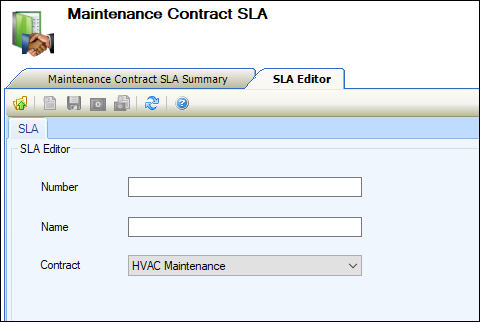
The SLA Editor screen is displayed.
-
- Enter the name and number, and select the relevant contract from the drop-down list.
- Click Save.
You can link a contract to specific Schedules of Rates, as defined in Rate Types reference data (accessed by navigating to Functions > Schedule of Rates > SOR).
To link a schedule of rates to the contract:
- Search for and open the relevant contract record.
-
Do one of the following:
-
Click the Link Schedule of Rates button in the Required Actions section

Note: This is only displayed if the contract does not have a contract scope.
-
Click the SOR(s) option in the Associated Items panel
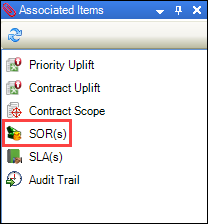
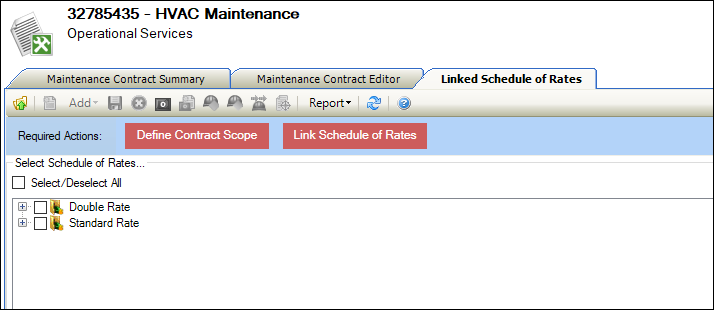
The Linked Schedule of Rates screen is displayed.
-
- Select the relevant rates. Alternatively, click the Select/Deselect All check box.
- Click Save.
Refer to Contract Management Reference Data for further information.
Refer to Manage Notes for further information.
Refer to Use Attribute Manager for further information.
